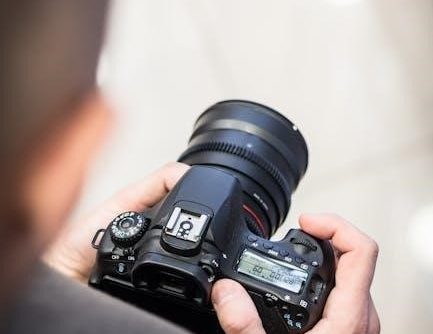
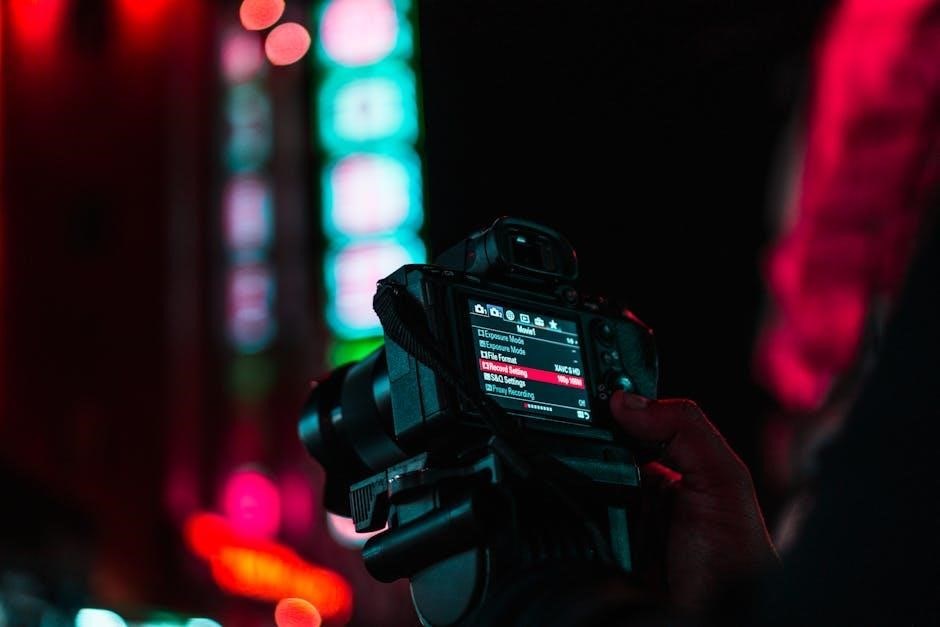
A manual camera settings cheat sheet is an essential guide for mastering aperture, shutter speed, and ISO. It helps photographers achieve precise control over their images, ensuring optimal exposure and creative freedom. Use it to understand the Kelvin scale, adjust white balance, and explore advanced techniques like exposure compensation and bracketing for stunning results.
Why Manual Mode is Essential for Photography
Manual mode empowers photographers with total creative control, allowing precise adjustments to aperture, shutter speed, and ISO. It enables capturing scenes as envisioned, overcoming auto-mode limitations. By mastering manual settings, photographers achieve optimal exposure, depth of field, and motion effects. A cheat sheet simplifies learning these controls, ensuring consistent results in various lighting conditions. This skill is vital for professionals and enthusiasts aiming to elevate their craft and produce high-quality, visually stunning images with ease and confidence.
Understanding the Exposure Triangle
The Exposure Triangle is the foundation of photography, comprising aperture, shutter speed, and ISO. These elements work together to control light intake and image exposure. Aperture regulates light entry, shutter speed determines exposure duration, and ISO adjusts sensor sensitivity. Balancing these ensures properly exposed photos. A cheat sheet helps photographers grasp how to adjust these settings for desired effects, whether freezing motion or creating depth of field. Mastering the Exposure Triangle is key to unlocking creative potential and achieving professional-quality results in any lighting scenario.
Mastering Aperture
Mastering aperture is central to photography, controlling light entry and depth of field. A cheat sheet simplifies understanding f-stop values, helping you achieve sharp focus or creative blur effortlessly in any setup.
What is Aperture?
Aperture is a fundamental camera setting that regulates the amount of light entering the lens. Measured in f-stops (e.g., f/2.8, f/8), it controls the size of the aperture, which is the camera’s “eye.” A lower f-stop value (like f/2) means a larger aperture, allowing more light in and creating a shallower depth of field. Conversely, a higher f-stop (like f/16) results in a smaller aperture, less light, and a deeper focus. Understanding aperture is crucial for achieving your desired visual effects in photography, whether isolating subjects or capturing sharp landscapes.
How Aperture Affects Depth of Field
Aperture plays a key role in determining depth of field, which refers to the area in focus within an image. A wide aperture (low f-stop, e.g., f/2.8) creates a shallow depth of field, blurring the background and isolating the subject. Conversely, a narrow aperture (high f-stop, e.g., f/16) results in a deeper depth of field, keeping more of the image sharp. This control allows photographers to emphasize subjects, create context, or achieve artistic effects, making aperture a powerful tool for visual storytelling and composition.
Using Aperture for Creative Control
Aperture is a powerful tool for creative expression, allowing photographers to control the narrative of their images. By adjusting the f-stop, you can isolate subjects with a shallow depth of field or emphasize context with a wider depth of field. A low aperture (e.g., f/2.8) creates a soft, blurred background, ideal for portraits, while a high aperture (e.g., f/16) sharpens the entire scene, perfect for landscapes. This flexibility enables photographers to tailor their compositions to convey their artistic vision effectively.
Shutter Speed Techniques
Shutter speed is a fundamental tool for controlling motion and achieving desired effects in photography. It allows photographers to freeze fast-moving subjects or create artistic blur, enhancing visual storytelling. Consulting a manual camera settings cheat sheet can help master various shutter speeds and their applications, ensuring dynamic and engaging imagery tailored to any scene or subject.
Controlling Motion with Shutter Speed
Shutter speed is a powerful tool for controlling motion in photography. Faster speeds, like 1/500th of a second, freeze action, while slower speeds, such as one second, create blur. A manual camera settings cheat sheet helps photographers master these techniques, ensuring sharp images of moving subjects or artistic motion effects. It guides when to use fast speeds for sports or wildlife and slow speeds for waterfalls or light trails, empowering photographers to convey dynamic energy or serene flow in their work.
Freezing vs. Blurring Moving Subjects
A manual camera settings cheat sheet helps photographers master techniques for freezing or blurring motion. Fast shutter speeds (e.g., 1/1000th of a second) capture sharp images of moving subjects, ideal for sports or wildlife. Slower speeds (e.g., 1 second) create artistic blur, perfect for waterfalls or light trails. The cheat sheet guides when to use each method, ensuring crisp details or creative effects. It empowers photographers to balance technical skills with artistic vision for dynamic, visually stunning results in various lighting conditions and scenarios.
Shutter Speed for Different Lighting Conditions
A manual camera settings cheat sheet provides guidance on selecting the right shutter speed for various lighting scenarios. In bright light, faster speeds (1/1000th of a second) prevent overexposure. Medium light may require mid-range speeds (1/500th), while low-light conditions often need slower speeds (1/30th) to let more light in. The cheat sheet also highlights when to pair slower speeds with narrower apertures or lower ISOs for balanced exposure, ensuring sharp, well-lit images in any environment without sacrificing creative control or technical precision.
ISO Settings Explained
ISO sensitivity adjusts your camera’s light capture, with lower values (ISO 100) for bright light and higher (ISO 6400) for low light. A manual camera settings cheat sheet helps minimize noise while achieving proper exposure, ensuring crisp images in all conditions by guiding optimal ISO selection.
Understanding ISO Sensitivity
ISO sensitivity determines how your camera’s sensor responds to light. Lower ISO values (e.g., ISO 100) are best for bright conditions, while higher values (e.g., ISO 6400) are used in low light. A manual camera settings cheat sheet helps photographers understand ISO’s role in balancing exposure. It explains how to minimize noise and grain in images, especially in challenging lighting. This guide ensures optimal image quality by teaching how to adjust ISO effectively for various scenarios, from daylight to nighttime photography, without compromising detail or clarity.
Minimizing Noise in Low-Light Photography
In low-light conditions, higher ISO settings can introduce noise, degrading image quality; To minimize this, use a tripod for stability and enable noise reduction features. Shoot in RAW format for better post-processing control. A manual camera settings cheat sheet recommends using the lowest necessary ISO and optimizing exposure. It also suggests focusing manually and using wider apertures to let more light in. These techniques help capture sharp, noise-free images even in challenging lighting scenarios, ensuring professional-grade results every time.
Best Practices for ISO Usage
ISO sensitivity is a cornerstone of manual camera settings. Always start with the lowest ISO possible, typically ISO 100, to minimize noise and ensure the cleanest image. In low-light conditions, gradually increase ISO while monitoring noise levels. Use a tripod or image stabilizer to avoid camera shake when using lower ISOs. For optimal results, manually focus to prevent autofocus noise and enable noise reduction features if available. A manual camera settings cheat sheet can guide you in balancing ISO with aperture and shutter speed for professional-quality images in any lighting scenario.
White Balance and Color Temperature
White balance and color temperature are crucial for capturing accurate colors. The Kelvin scale helps adjust settings, ensuring realistic tones or creative effects. Mastering this enhances image quality and mood.
Understanding Kelvin Scale in Photography
The Kelvin scale measures color temperature, ranging from 1,000K to 10,000K. Lower values represent warm tones (e.g., candlelight at 1,500K), while higher values indicate cool tones (e.g., daylight at 5,500K). Photographers use this scale to adjust white balance, ensuring accurate color representation. Understanding the Kelvin scale helps in capturing scenes with natural or creative color tones, enhancing the mood and quality of images. It’s a fundamental tool for achieving visually appealing results in various lighting conditions.
Adjusting White Balance for Accurate Colors
White balance ensures colors appear natural under different lighting conditions. It’s set using the Kelvin scale or presets like Daylight, Tungsten, or Fluorescent. For precision, use a gray card or manual modes like Cloudy or Shade. Auto White Balance often works well but may fail in mixed lighting. Custom settings allow you to dial in exact temperatures, enhancing color accuracy. Adjusting white balance is crucial for professional results, as it eliminates unwanted color casts and ensures images look true to life, whether in natural or artificial light.
Using White Balance for Creative Effects
White balance can be adjusted to create artistic effects, enhancing the mood of your photos. For example, setting a cooler tone with fluorescent or shade presets can add a calming feel, while warmer tones like incandescent or warm white can evoke nostalgia. Experimenting with custom white balance allows you to emphasize certain colors or create dramatic contrasts. This technique is especially useful in landscapes, portraits, and still-life photography, letting you dictate the emotional tone of your images. Use a cheat sheet to explore these creative possibilities and refine your style.

Advanced Camera Settings
Advanced camera settings offer precise control through exposure compensation, bracketing, and focus modes like AF-S, AF-C, and MF, enhancing your photography’s versatility and quality.
Using Exposure Compensation
Exposure compensation allows photographers to adjust the brightness of an image by overriding the camera’s metered exposure. By dialing in positive or negative values, you can fine-tune the exposure to suit the scene, ensuring highlights and shadows are preserved. This feature is particularly useful in high-contrast situations or when shooting in challenging lighting conditions. For example, a backlit subject may require +1 to +2 stops of compensation to properly expose the foreground. It’s a powerful tool for achieving balanced and visually appealing results.
Bracketing for HDR Photography
Bracketing is a technique where multiple shots of the same scene are captured at different exposures. This process is essential for HDR (High Dynamic Range) photography, as it captures both highlights and shadows in high-contrast scenes. By shooting a series of images at varying exposure levels, photographers can later merge them into a single image with enhanced detail and tonal range. Most cameras offer auto-bracketing, allowing you to set the number of shots and exposure intervals. This method ensures dynamic results, especially in challenging lighting conditions.
Focus Modes: AF-S, AF-C, and MF
Understanding focus modes is crucial for sharp images. AF-S (Single AF) focuses on stationary subjects, locking focus once. AF-C (Continuous AF) tracks moving subjects, adjusting focus constantly. MF (Manual Focus) allows precise control using the lens ring, ideal for macro or low-light shots. Each mode serves different needs, ensuring clarity and accuracy in various shooting scenarios. Mastering these modes enhances your ability to capture sharp, professional-looking photos with ease and precision.
Mastering manual camera settings enhances your photography skills. Practice with a cheat sheet to refine techniques and explore resources for continued learning and improvement.
Practicing with a Manual Camera Settings Cheat Sheet
A cheat sheet is a valuable tool for mastering manual camera settings. It provides a quick reference guide for understanding aperture, shutter speed, and ISO. By practicing with a cheat sheet, photographers can learn how to adjust settings for different lighting conditions and creative effects. Regular exercises, such as shooting in various modes and troubleshooting common issues, help build confidence. Use the cheat sheet to explore advanced techniques and refine your skills for consistent, professional results in every photo.
Recommended Resources for Further Learning
To deepen your understanding of manual camera settings, explore online courses, YouTube tutorials, and photography blogs. Books like “Understanding Exposure” by Bryan Peterson offer in-depth insights. Join photography communities for feedback and inspiration. Utilize apps and websites that provide interactive learning tools. These resources will help you refine your skills and stay updated on the latest techniques in photography, ensuring continuous improvement in your craft.